How To Redact In Preview: Redact PDFs on Your Mac For Free!

In business, and otherwise, we often have sensitive documents that we need to pass on to people. People seem to think that simply drawing shapes on a PDF document is sufficient to redact the information contained in a document, but this is hardly the case.
When people digitally draw on PDFs, they think that the information has been hidden forever. However, there are ways of reversing this technique of obscuring confidential information and is not appropriate for sensitive documents. This technique might work for physical copies, but not for e-documents.
Certain types of documents may also contain metadata. Typically, this can contain information such as the title, author, and the main subject matter of the document. If any of this information is sensitive, make sure you obscure it before distributing the content.
Related: How to split PDFs with Preview on Mac
 The Uptide
How To Redact Documents & Text Using Preview
If you have a Mac OS, you do not need any additional third-party software to redact text from your PDFs. Mac's in-built PDF app, Preview, comes with all the necessary tools to redact documents efficiently. You can have your sensitive information permanently deleted in seconds! Here's how you can do just that.
Step 1: Open and edit your document in Preview
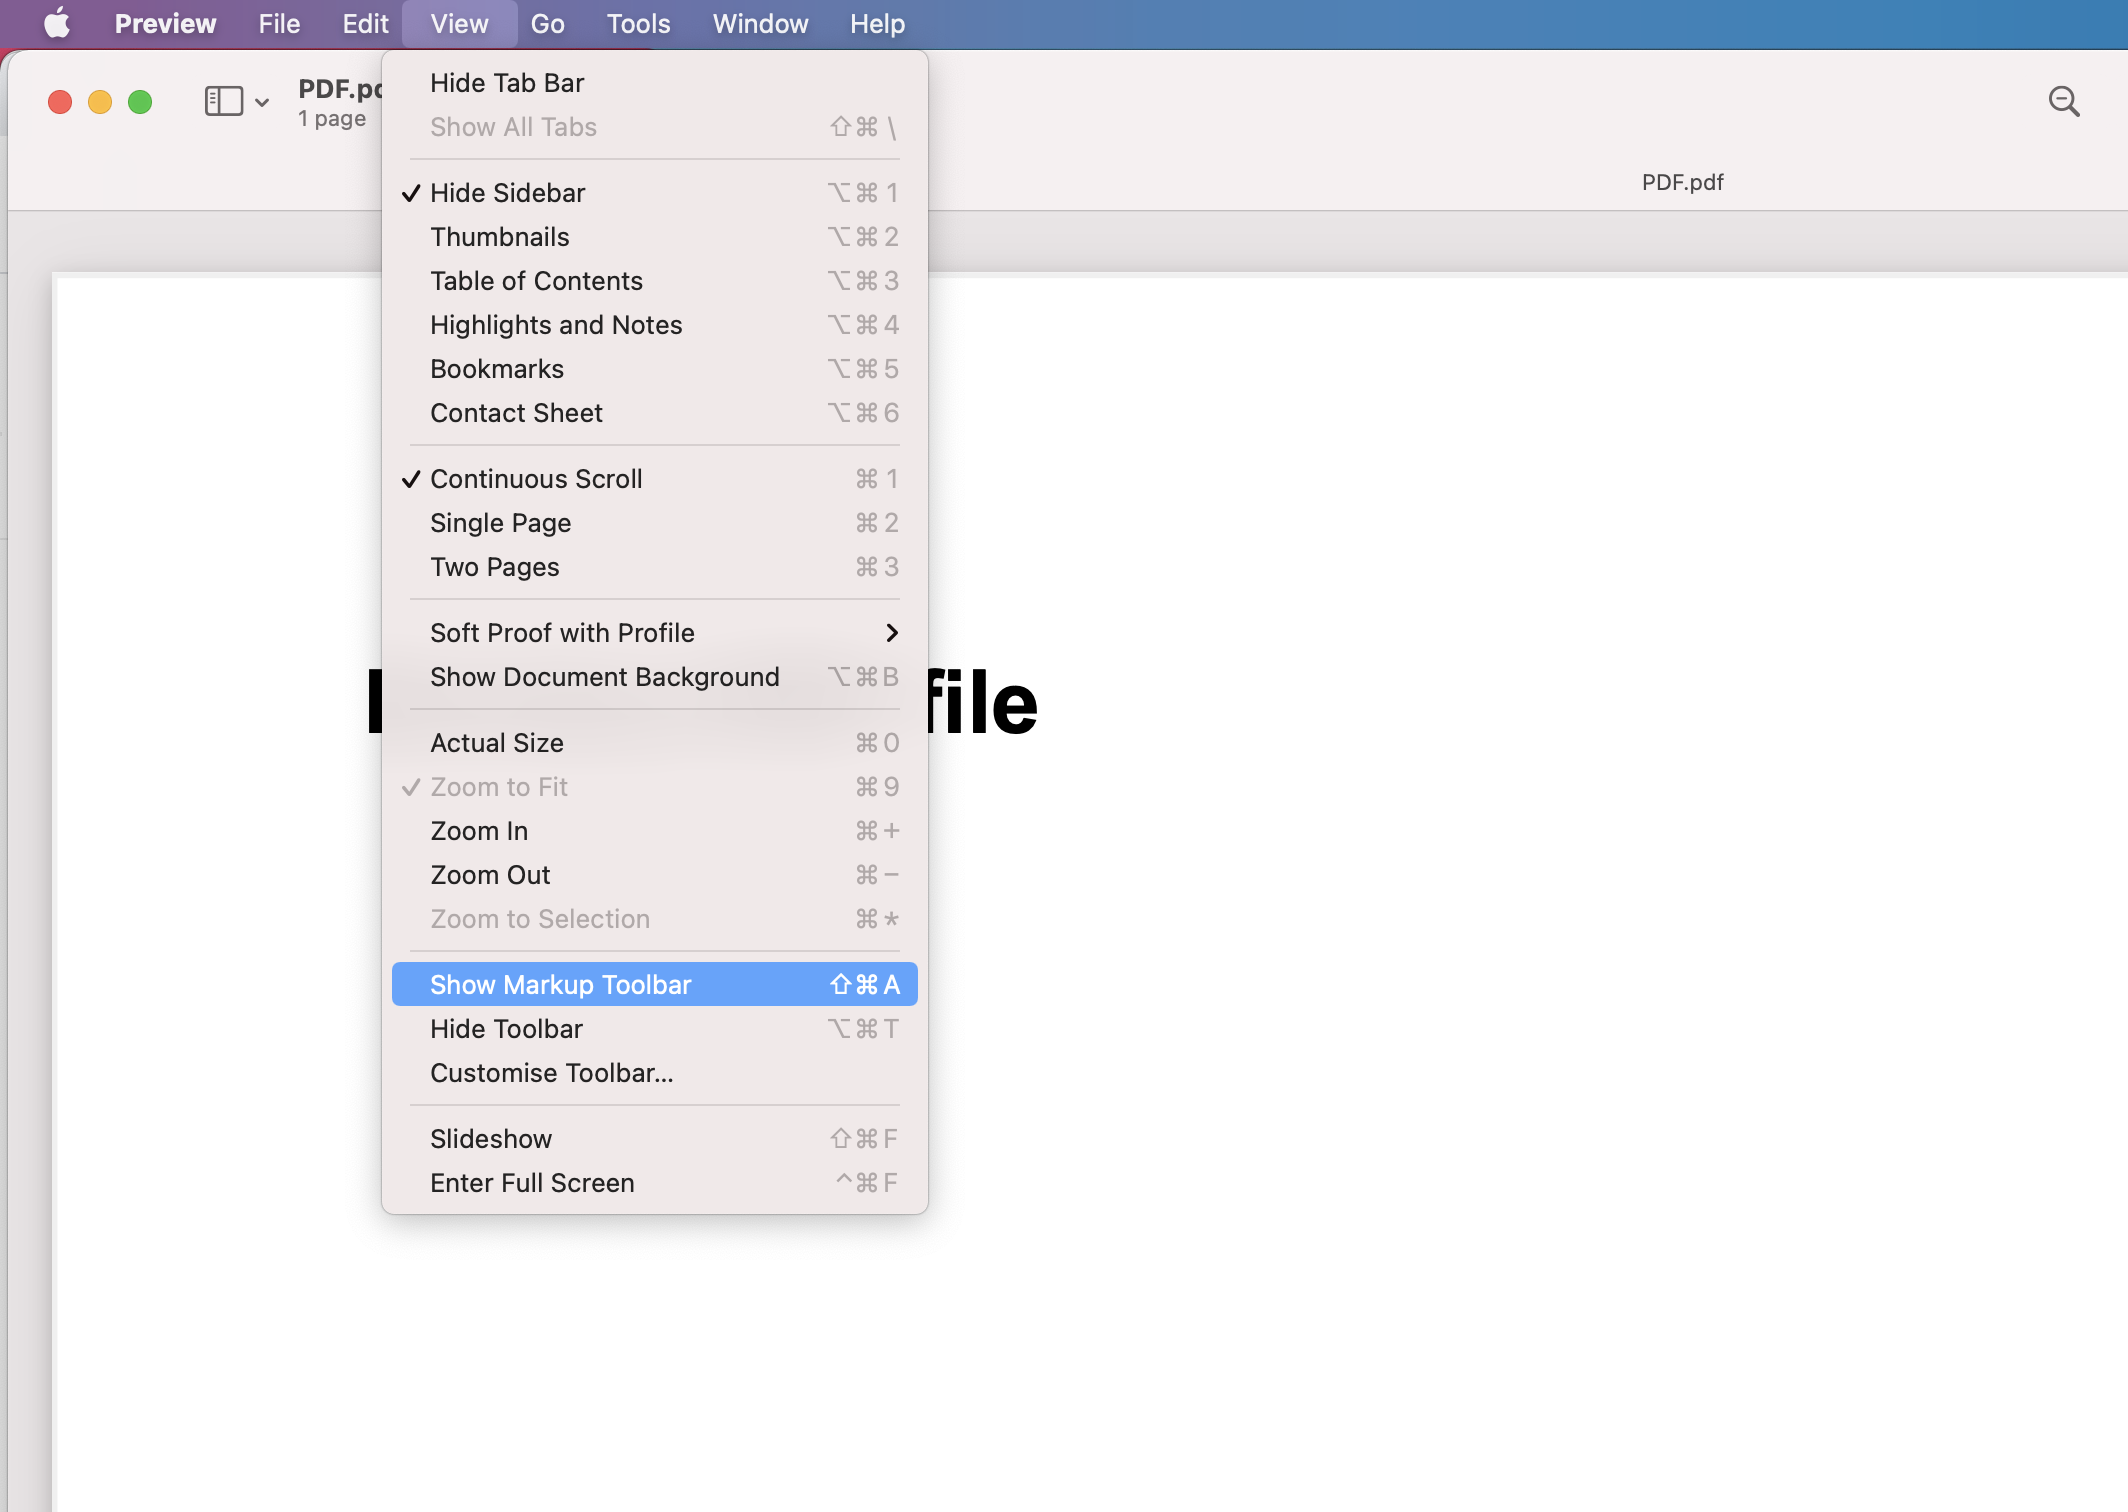
First, open your document in preview. Then, you will need to access the annotation toolbar to make changes to your document. There are two ways to do this.
Click on the view option in the toolbar at the top and scroll down to Show Markup Toolbar, click on this.
Alternatively, you can click on the little pen icon right next to the search bar in the top right corner. This will open the annotation bar. Now, you can start making changes to your document.

Step 2: Select the redaction tool
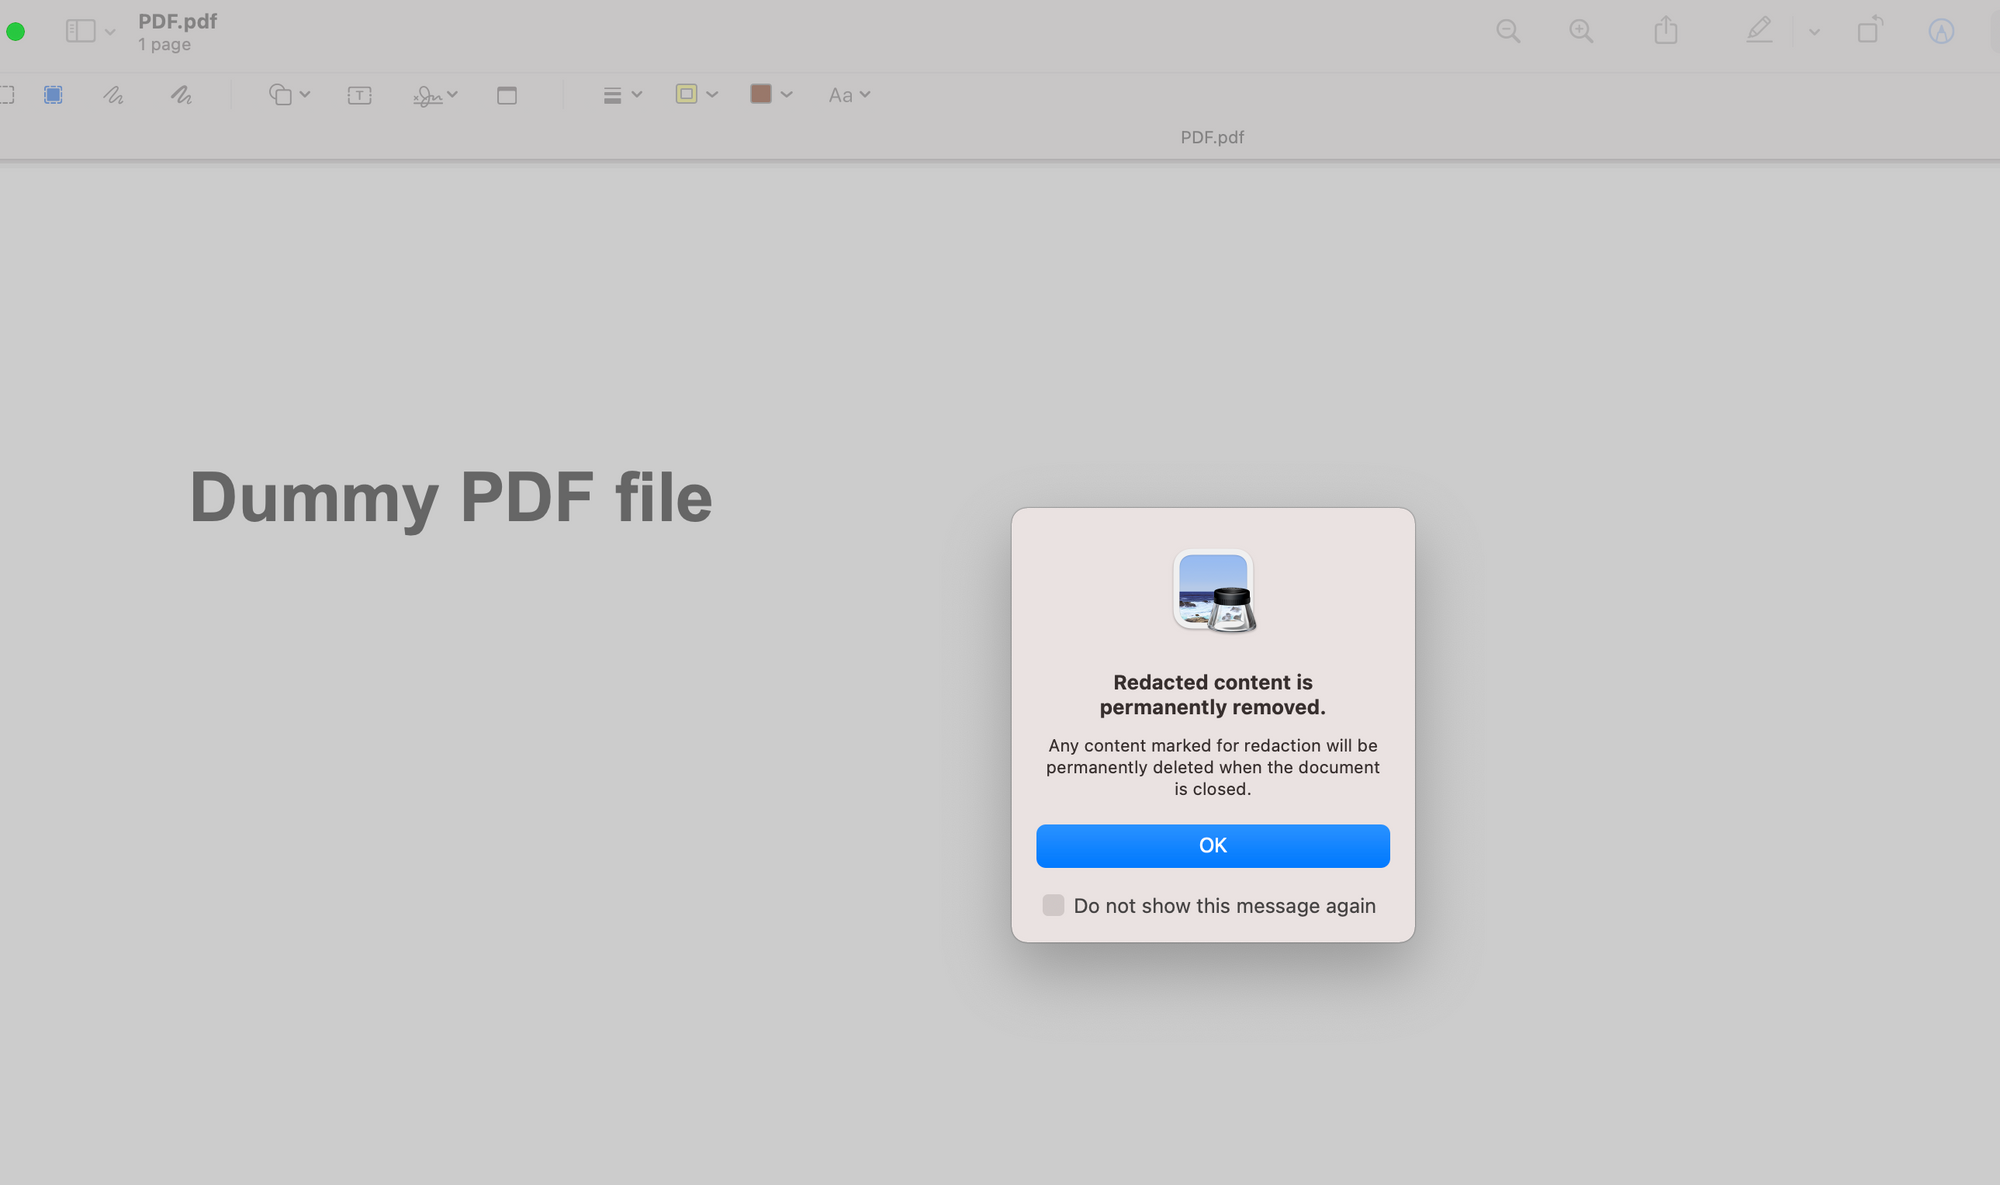
The redaction tool icon looks like a solid square with a dashed border. Click on this to activate redact mode.

When you select the redaction tool, you will get an alert telling you that the redacted content will be permanently removed. If this is what you want, go ahead and accept this by pressing ok.
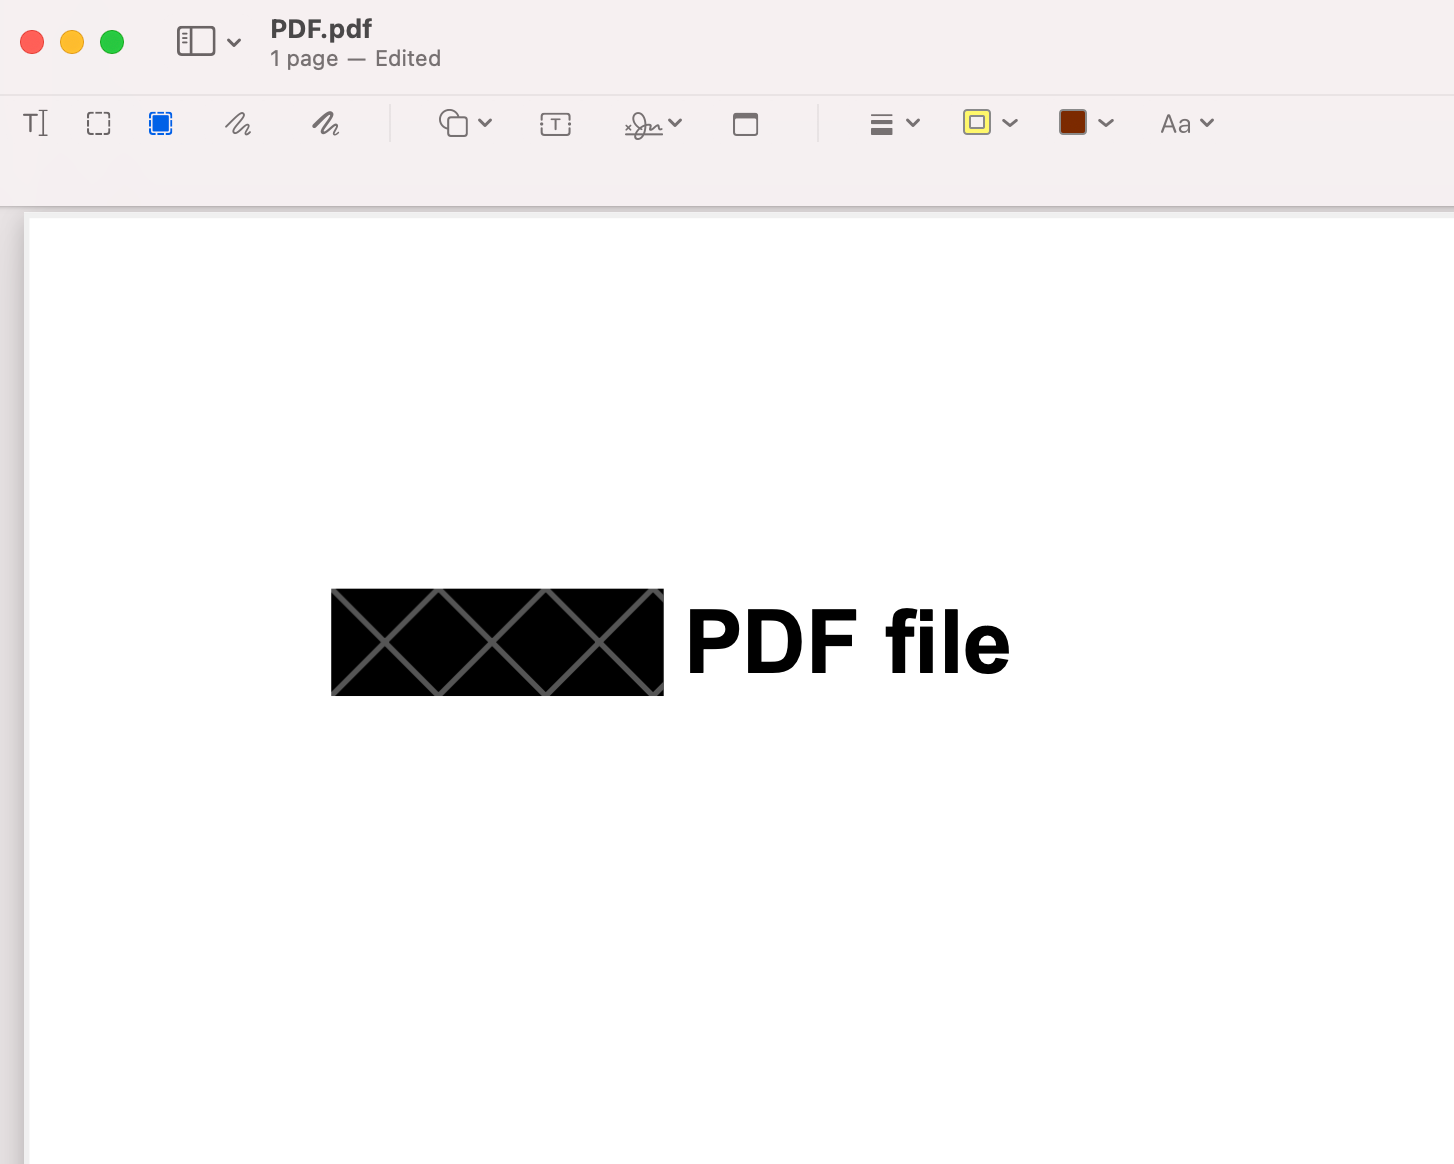
Step 3: Redact the sensitive text
The redaction tool works similarly to a highlighter. Simply drag your cursor across everything you consider sensitive. A series of black checked boxes will appear on all the text that has been redacted.
Step 4: Save and close your file
Once you're happy with your edited content, it is time to save the file. Remember, redaction is permanent and you will not be able to recover any of your work once you have saved and closed your file. Make sure to double-check your work before saving any changes to make sure that your content isn't lost forever.
If you have to, make copies of your file. One for your own personal use with the non-redacted content, and another for distribution.
That's it! That's all you need to do to ensure that any sensitive information contained in your document does not get into the wrong hands.